Expenses
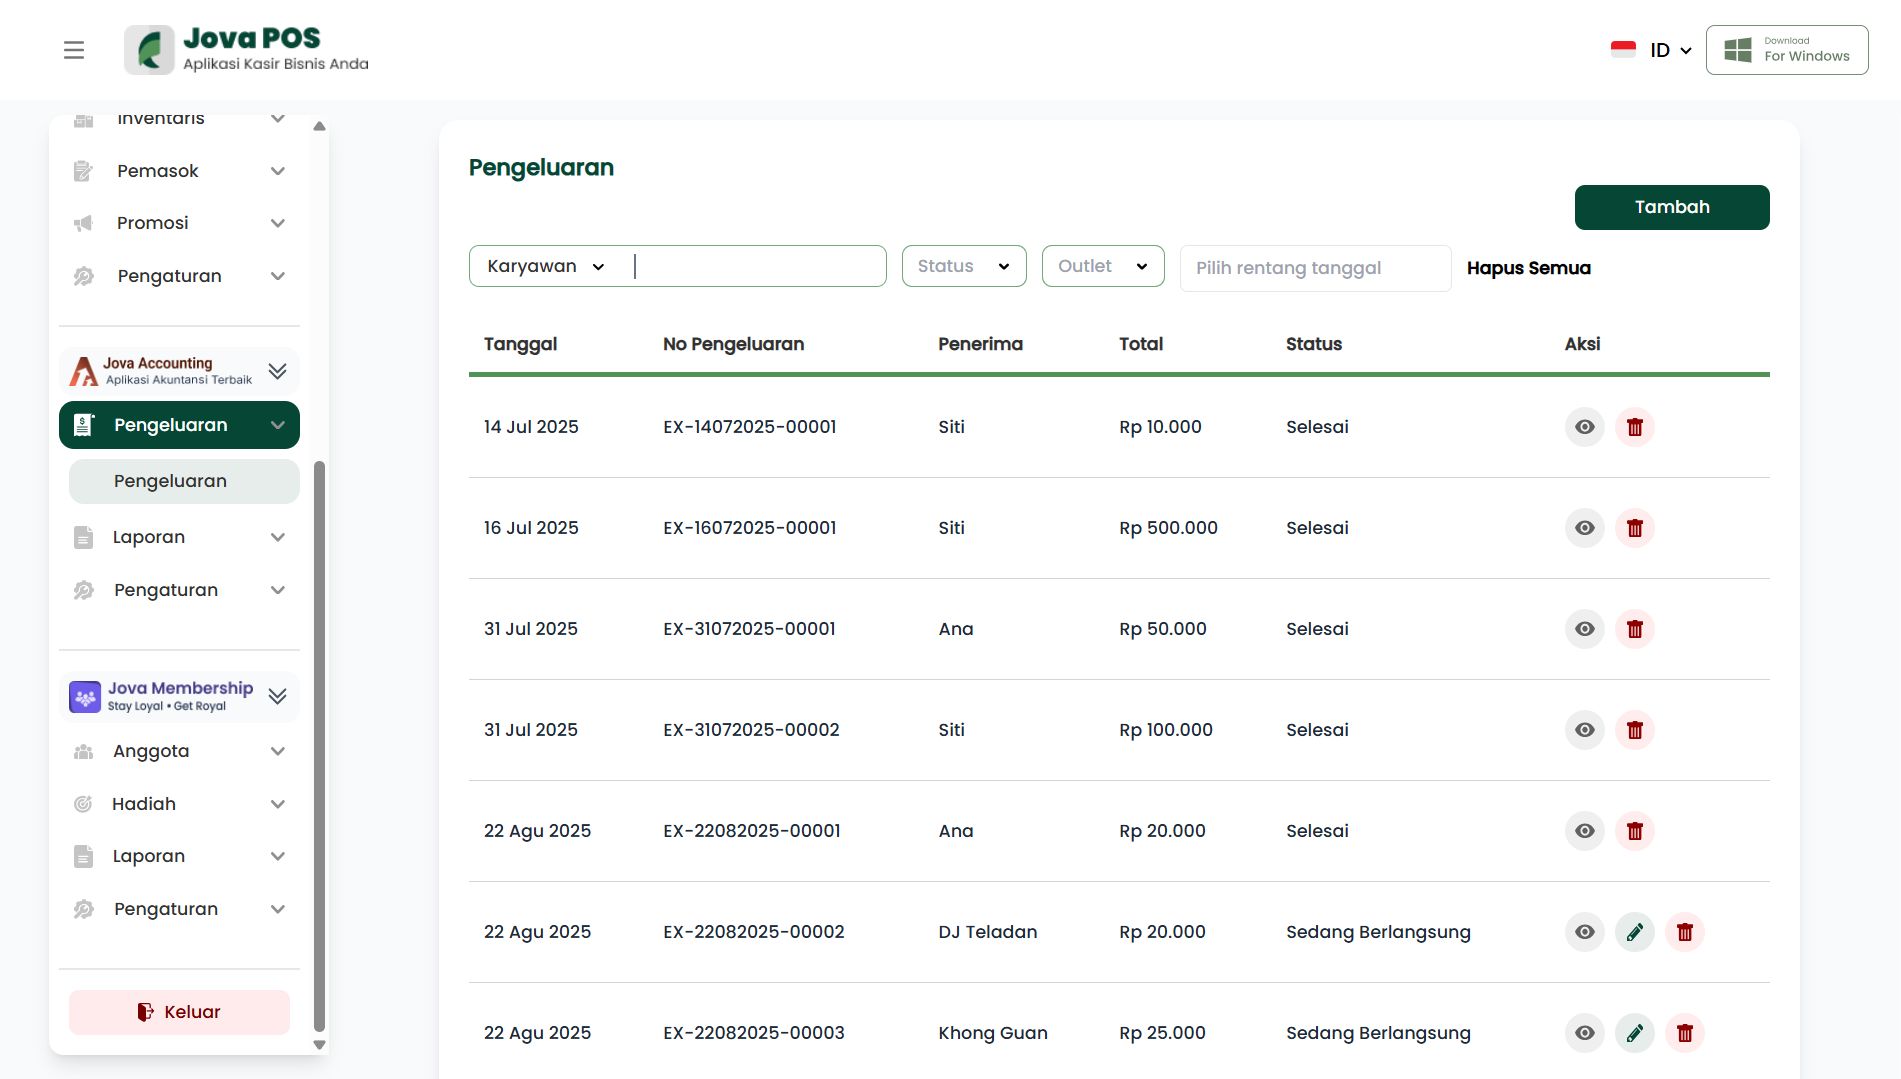
The Expenses page is used to record store operational expenses and monitor expense transaction history. On this page, you can search for data, view transaction status, and add new expenses along with item details.
1. Viewing the expense list
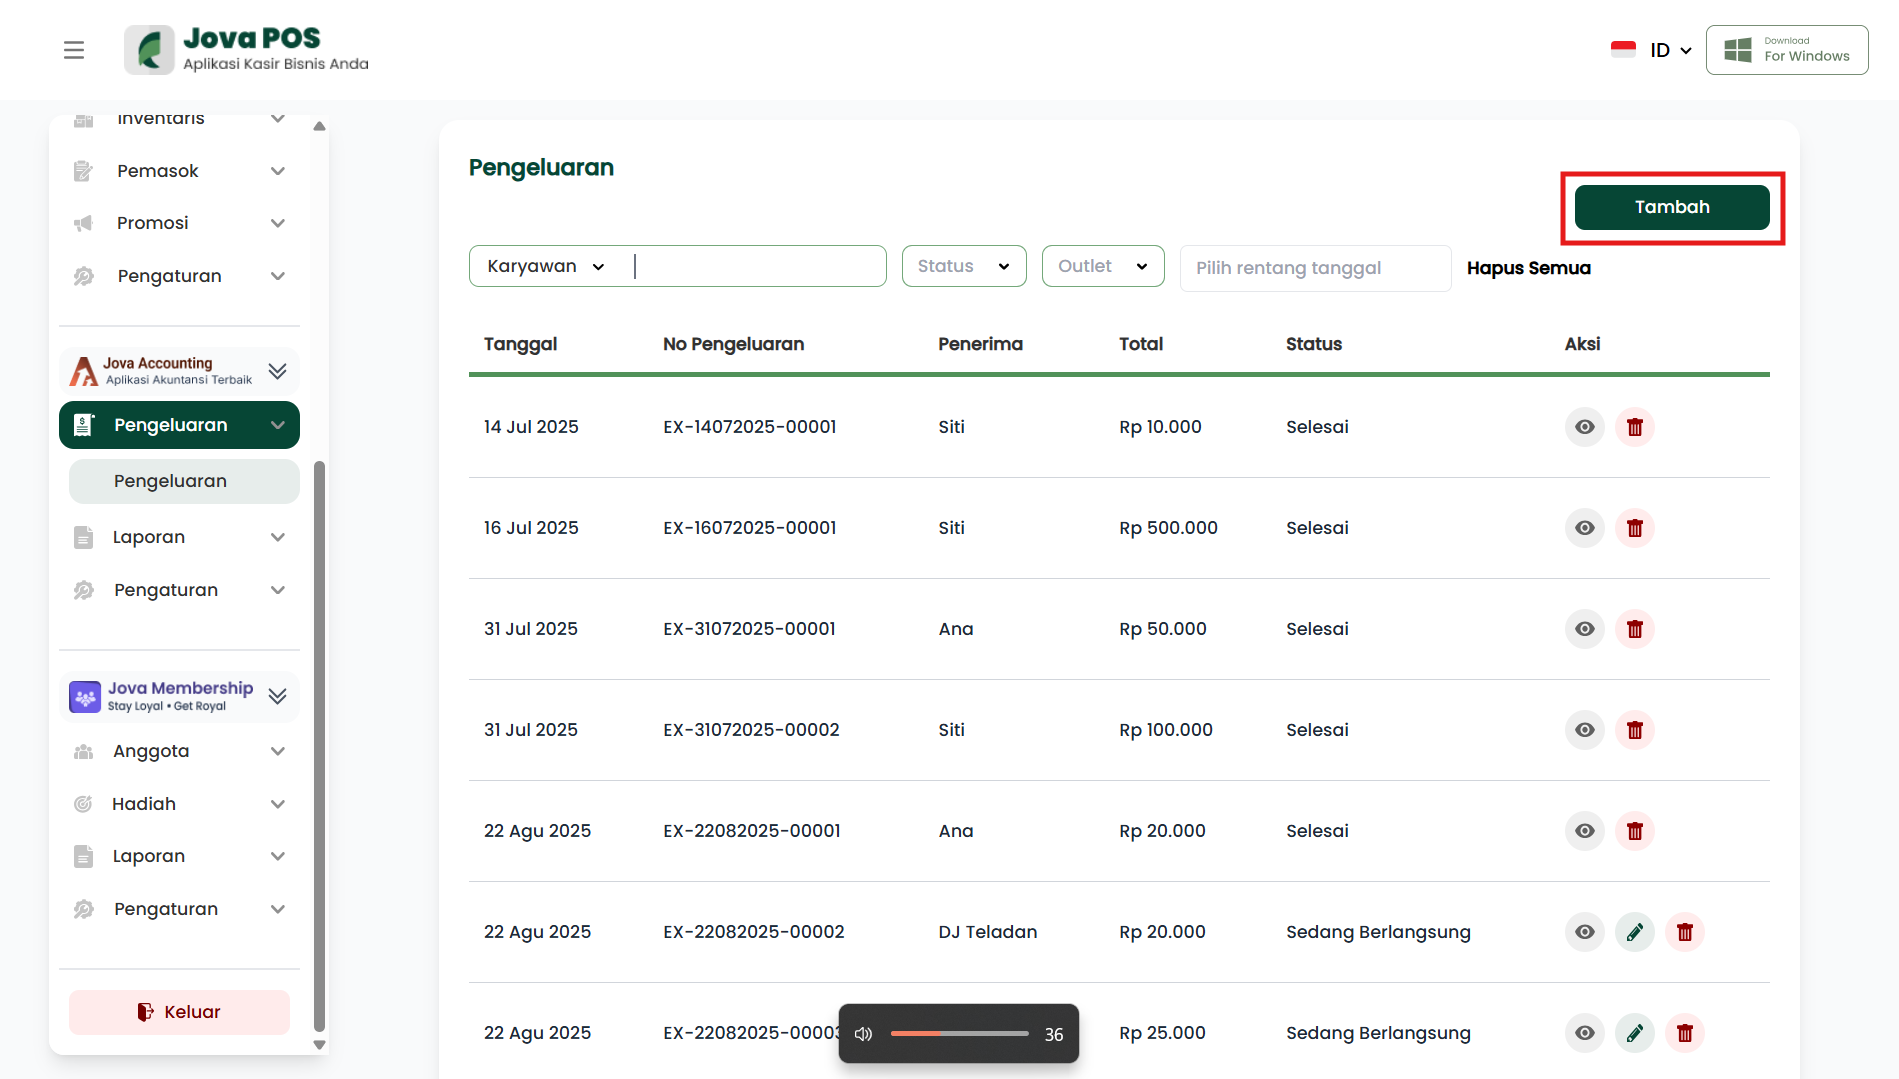
Open the Jova Accounting → Expenses menu to view the list of recorded expense transactions.
In this list view, you can:
- View completed and ongoing transactions (depending on status).
- Ensure the expense number and recipient are correct.
- Check the total amount per transaction.
- Perform quick actions such as viewing details or deleting (depending on access rights).
Search filter section
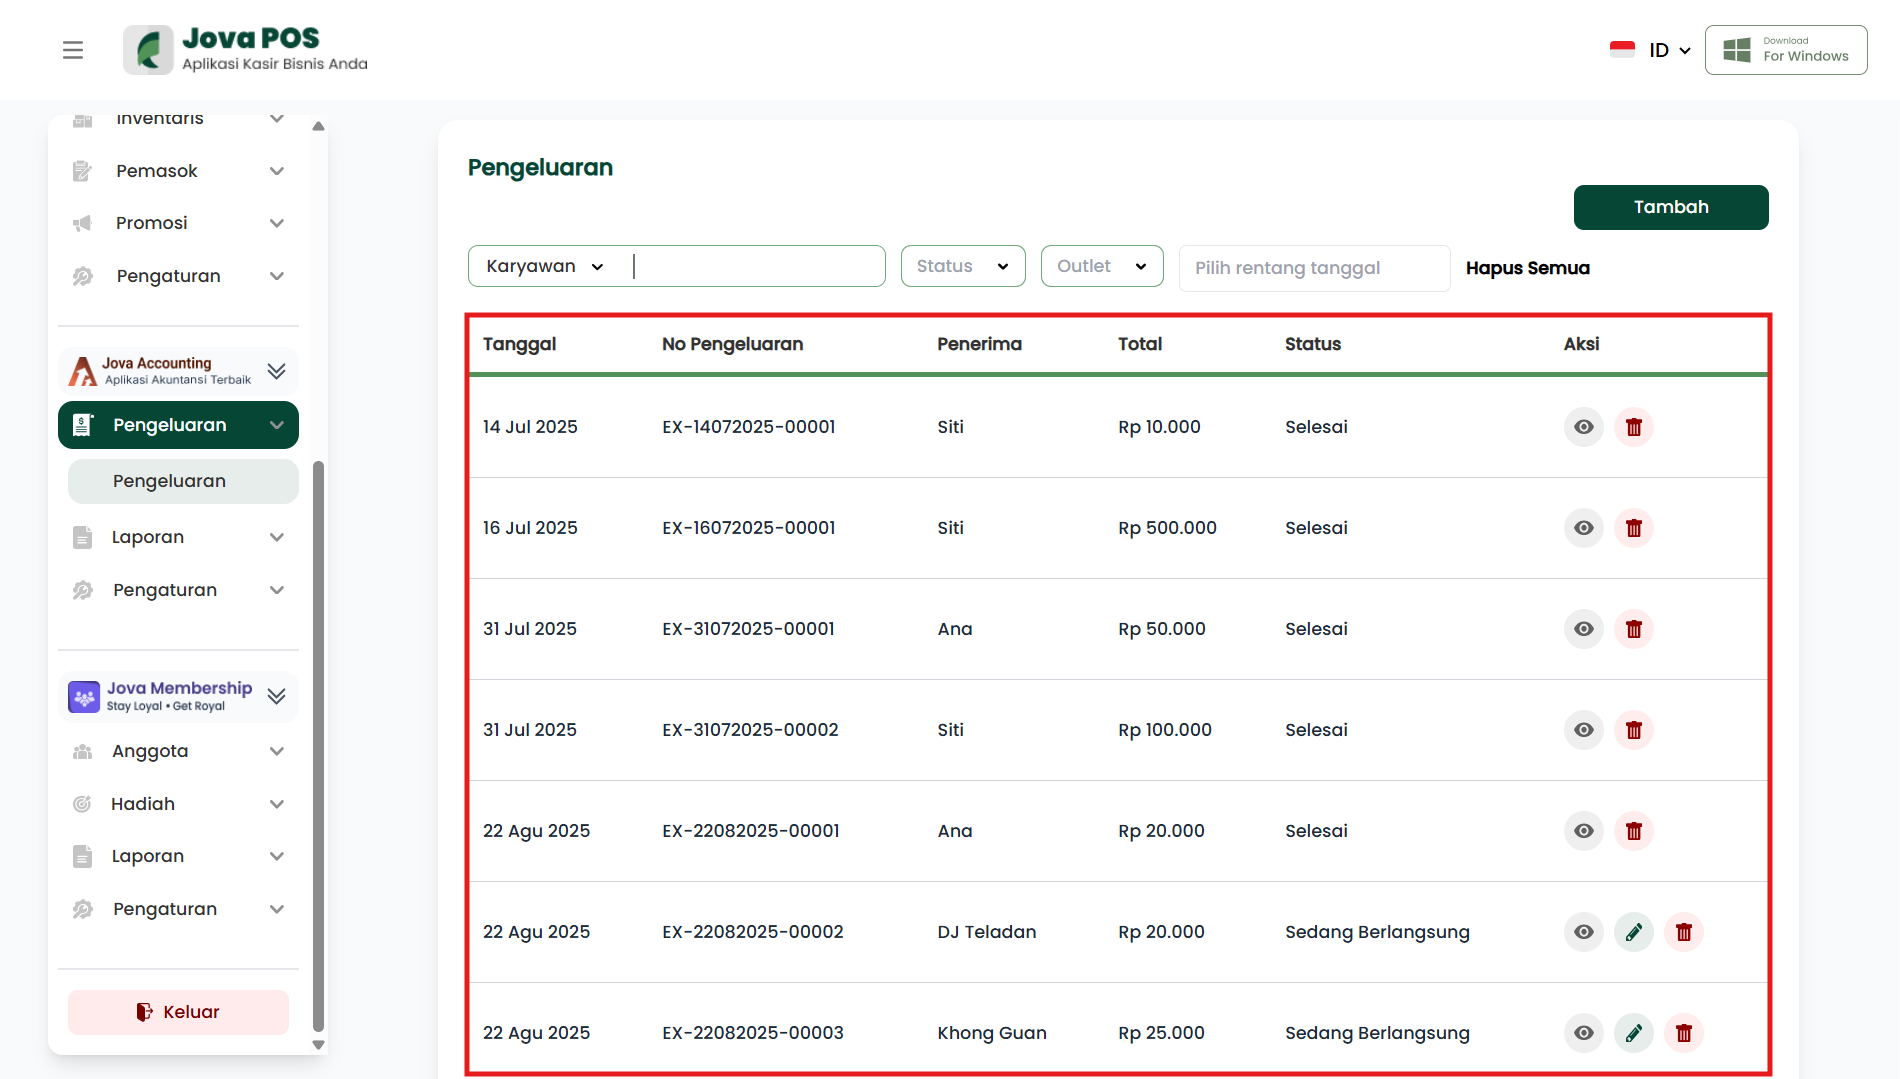
At the top of the table, filters are available to speed up data searching. These filters are helpful when there are many transactions or when you only want to view specific transactions.
Available filters:
- Employee: displays expenses by specific recipient/employee.
- Status: filters transactions by transaction status, e.g., Completed or Ongoing.
- Outlet: displays transactions according to the selected outlet.
- Select date range: displays transactions within a specific time period, e.g., per week, per month, or specific dates.
- Clear All: resets filters to their initial state so the table displays all data.
Filter usage tips:
- If data does not appear, double-check the date range or currently active outlet.
- Combine multiple filters for more specific results, e.g., Outlet + Date Range + Status.
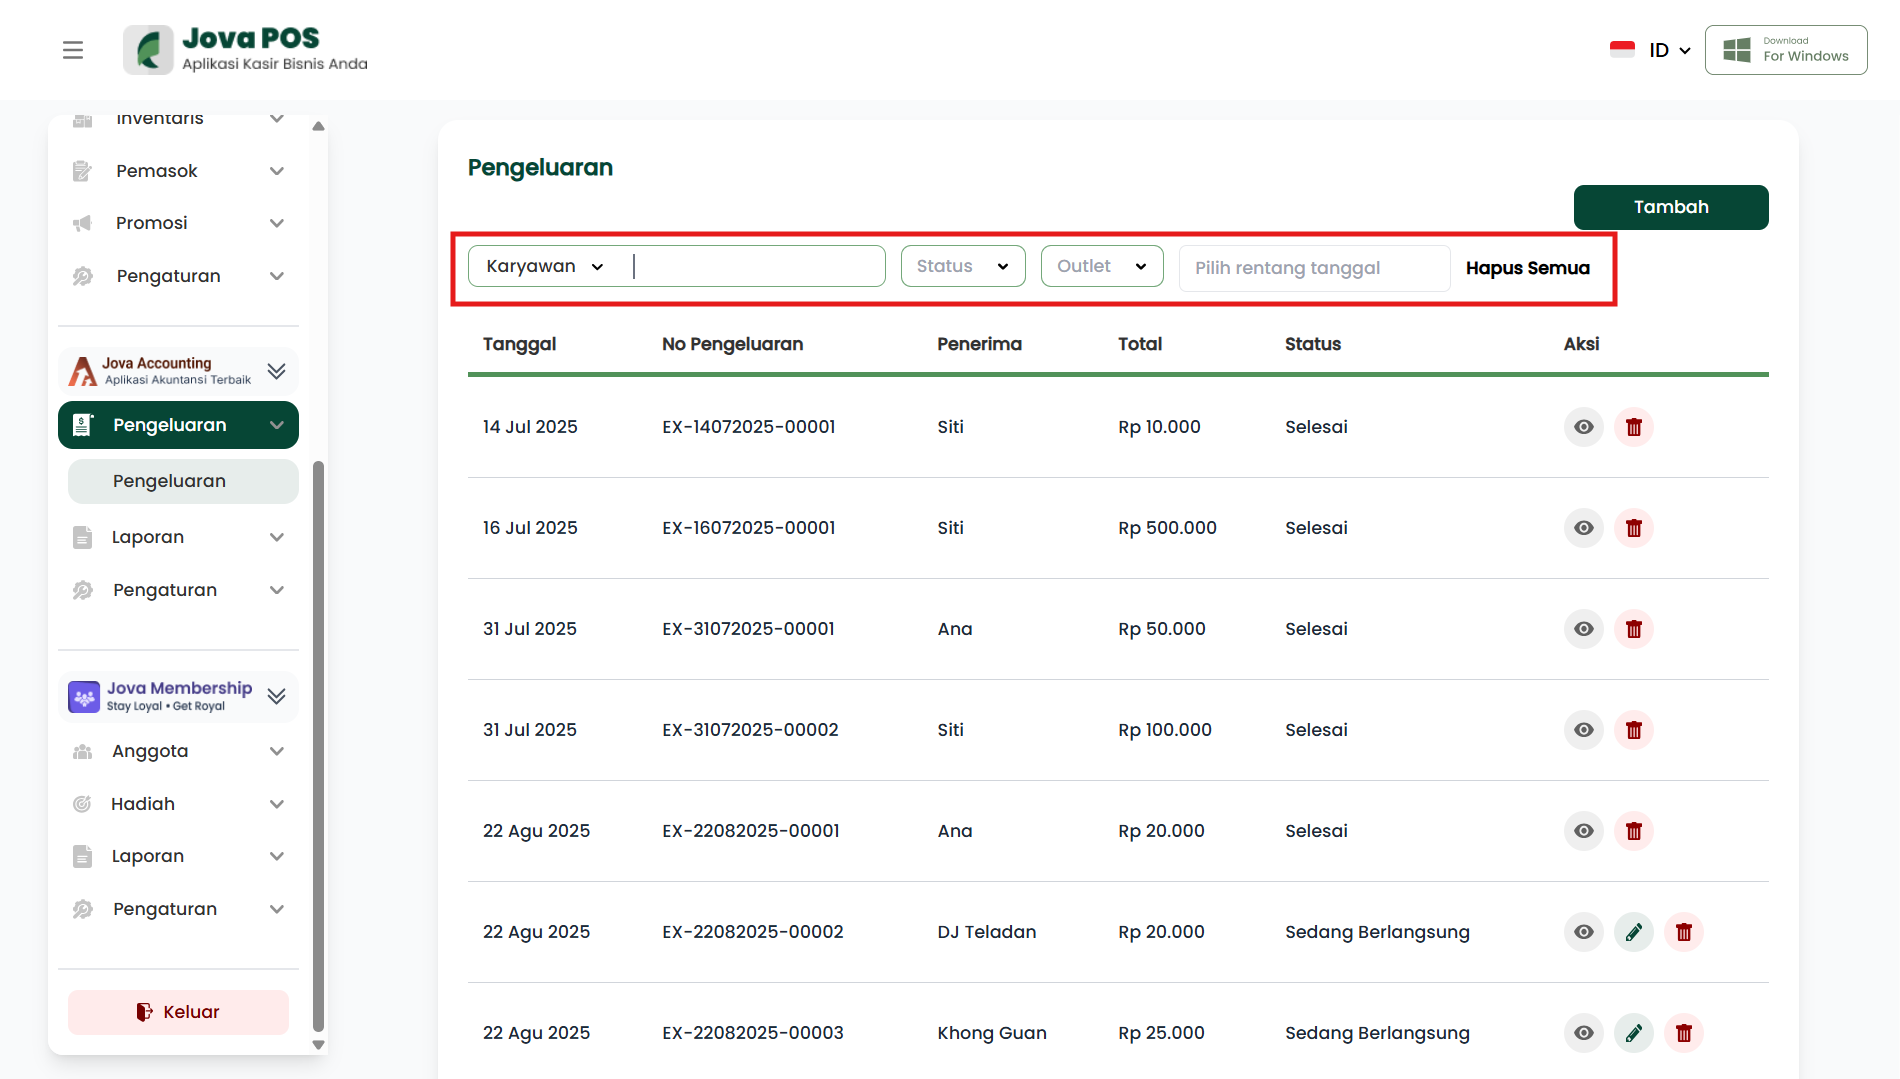
Table list section
This section displays a summary of transactions in table form. Common columns displayed are:
- Date: the date the expense transaction was recorded.
- Expense No: unique transaction number as identity and reference for searching.
- Recipient: the name of the party/employee receiving the expense.
- Total: the total amount of all expense items in the transaction.
- Status: transaction status (e.g., completed or ongoing).
- Action: button/icon for further actions.
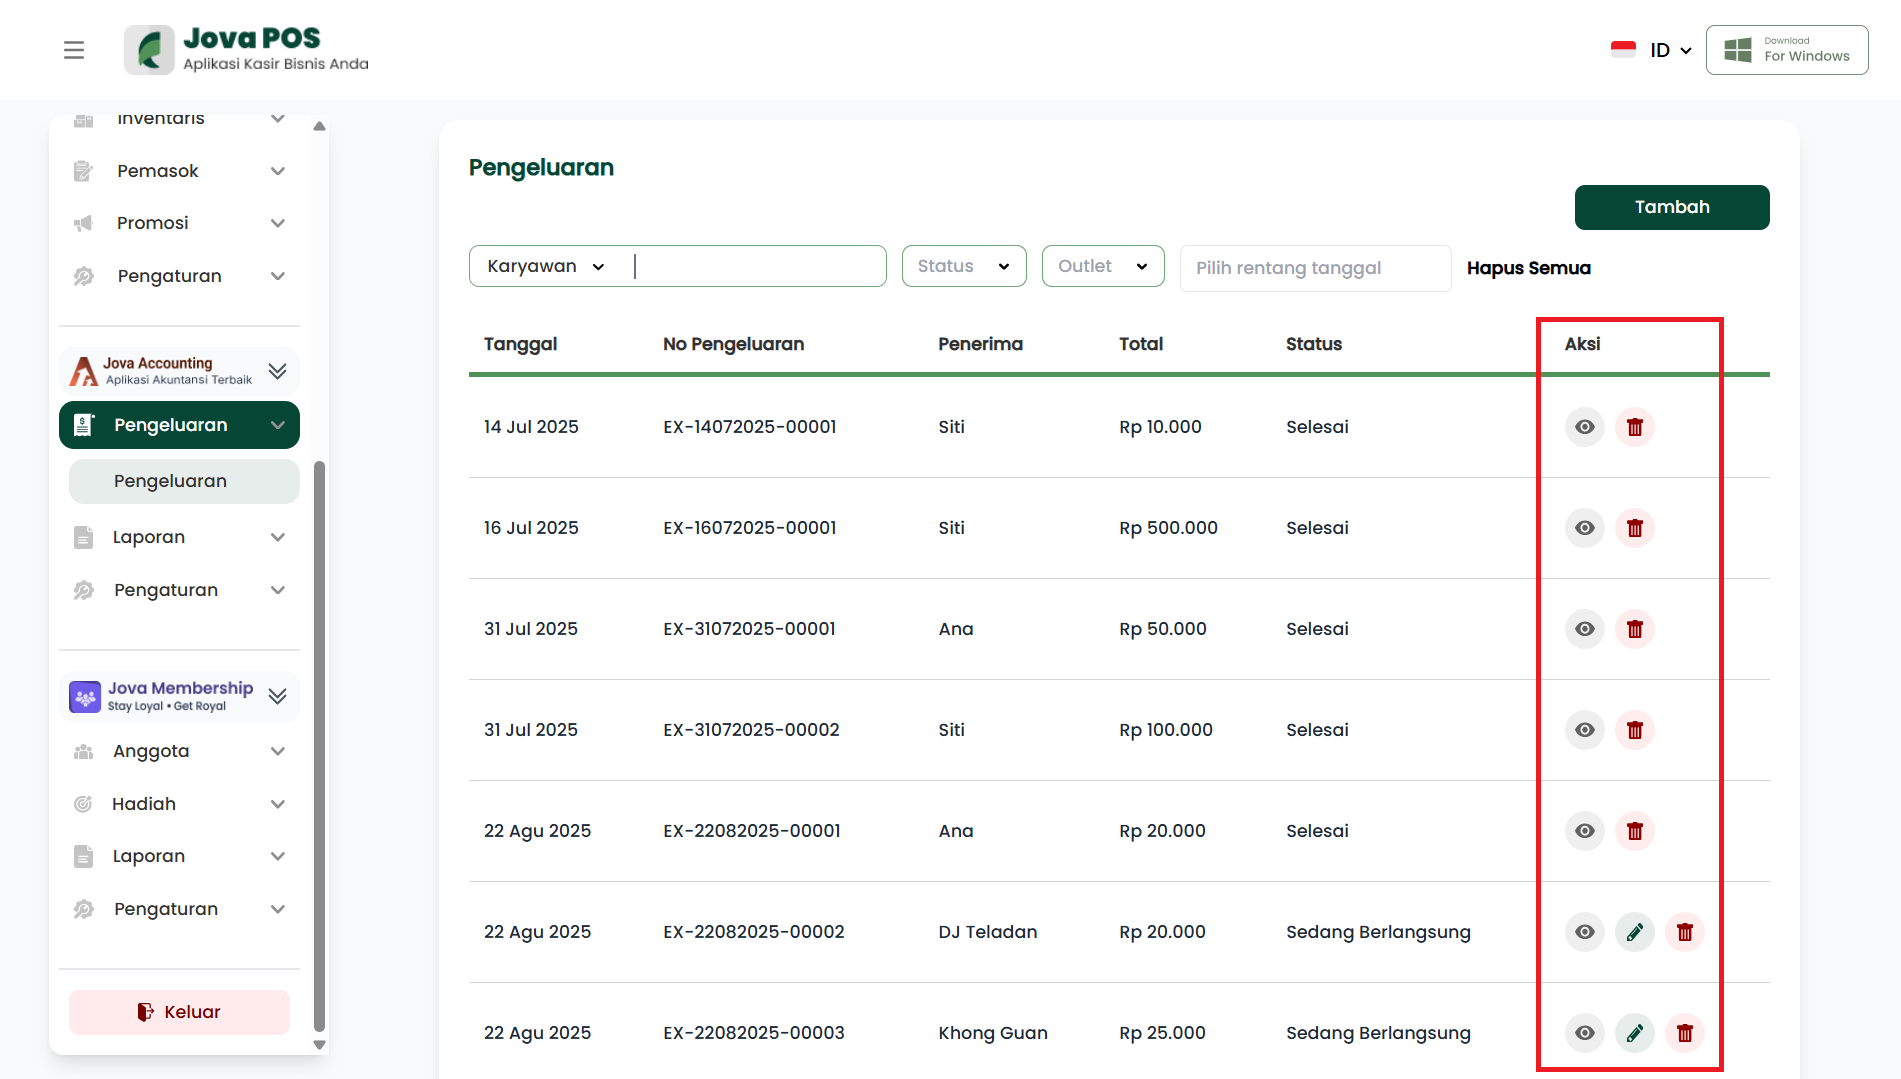
In the Action column, common icons are:
- Eye icon: opens transaction details.
- Pencil icon: modifies the transaction (if the feature and access rights permit).
- Trash icon: deletes the transaction (usually requires confirmation).
2. Adding a new expense
To record a new expense, follow these steps.
- On the Expenses page, click the Add button at the top right.
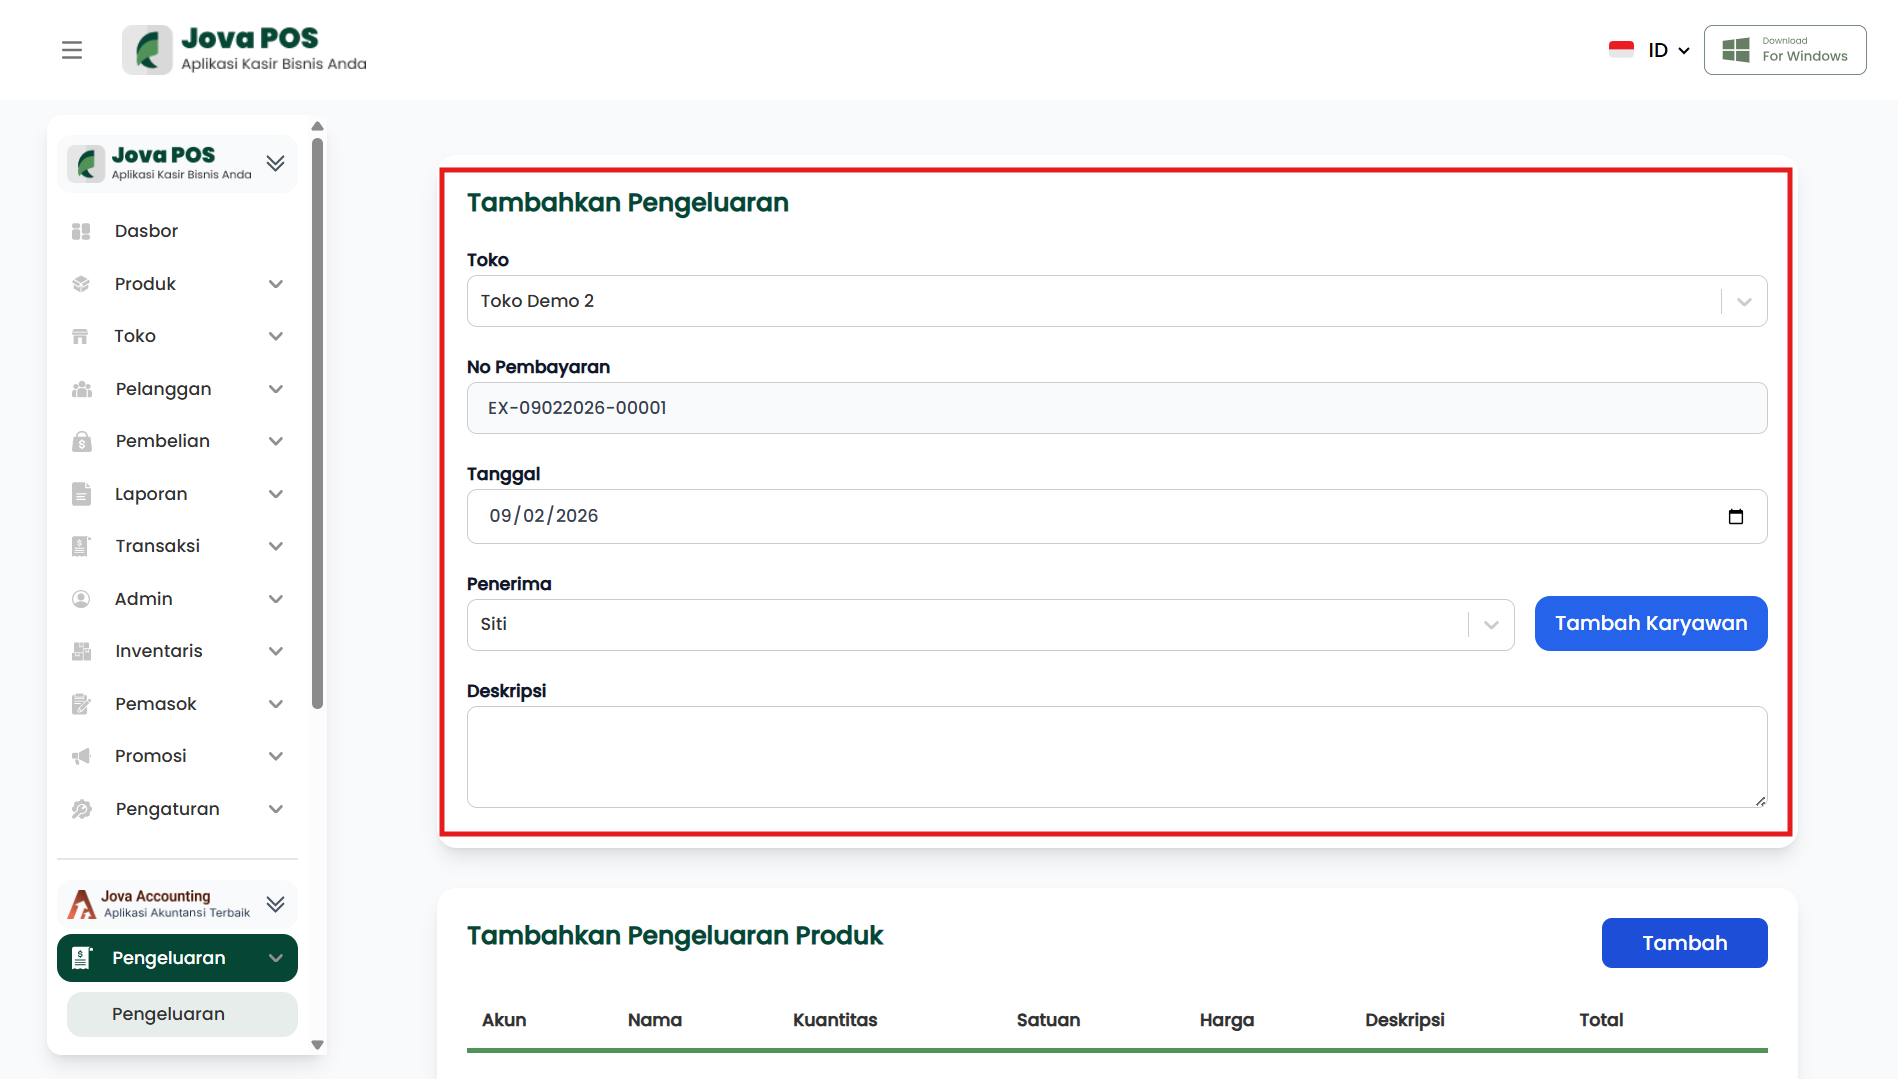
- The system opens the Add Expense page. In this section, fill in the main transaction information.
Explanation of fields to fill in:
- Store: select the store/outlet where the expense is recorded. Make sure it matches the transaction location.
- Payment No: usually auto-filled by the system as the transaction number. This number is used as the identity in the expense list.
- Date: select the date the expense was made. It is recommended to fill in the actual date for organized reporting.
- Recipient: select the employee/recipient responsible or receiving the funds/items.
- Description: enter a brief note to explain the purpose of the expense, e.g., purchasing work tools, operational costs, or urgent needs.
Examples of helpful descriptions:
- Mouse purchase for cashier
- Operational transportation costs
- Equipment repair needs
3. Adding an employee (optional)
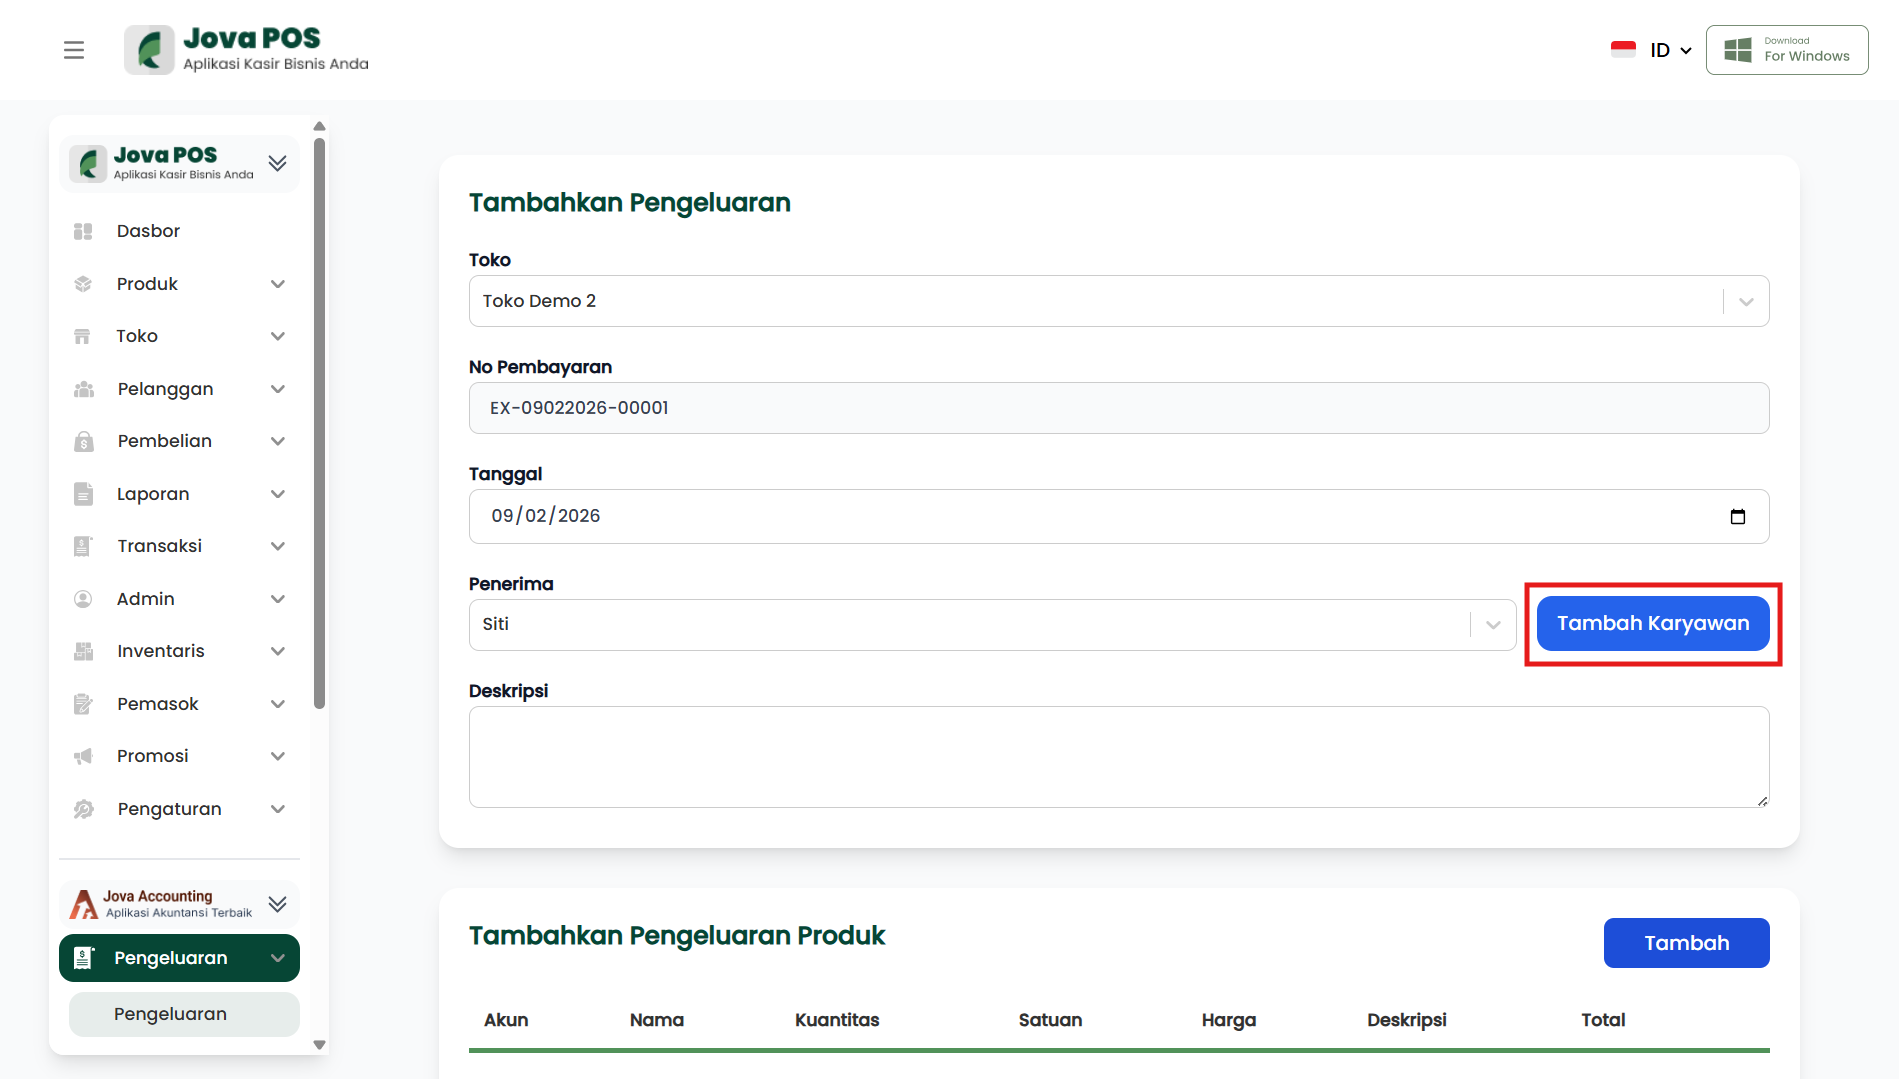
If the employee name does not appear in the Recipient options, you can add them directly from this page.
- Click the Add Employee button.
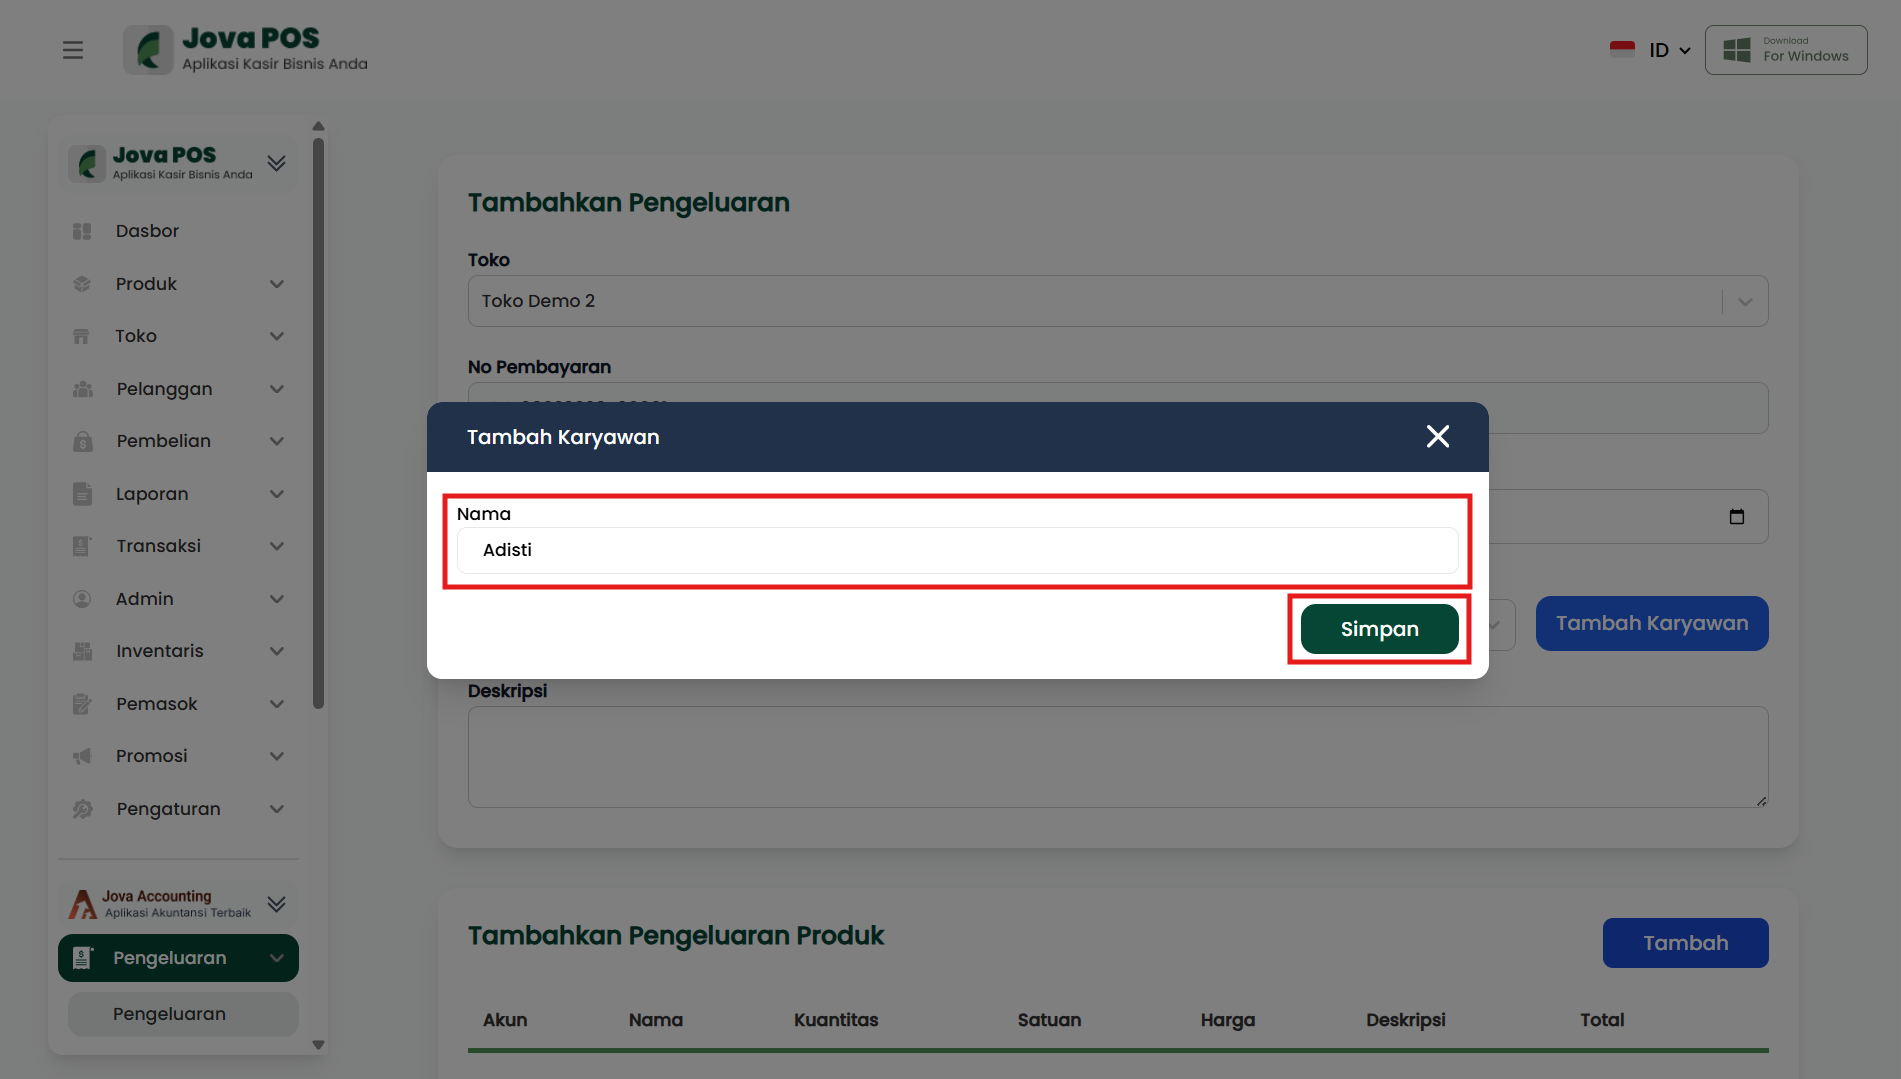
- In the Add Employee popup, fill in:
- Name: enter the employee name. Use a name consistent with the store's internal data.
- Click Save to save the new employee. After saving, the name should be selectable in the Recipient dropdown.
4. Adding expense product details
The Add Expense Product section is used to enter expense item details. These items will form the total transaction amount.
- Click the Add button in the Add Expense Product section to add an item row.
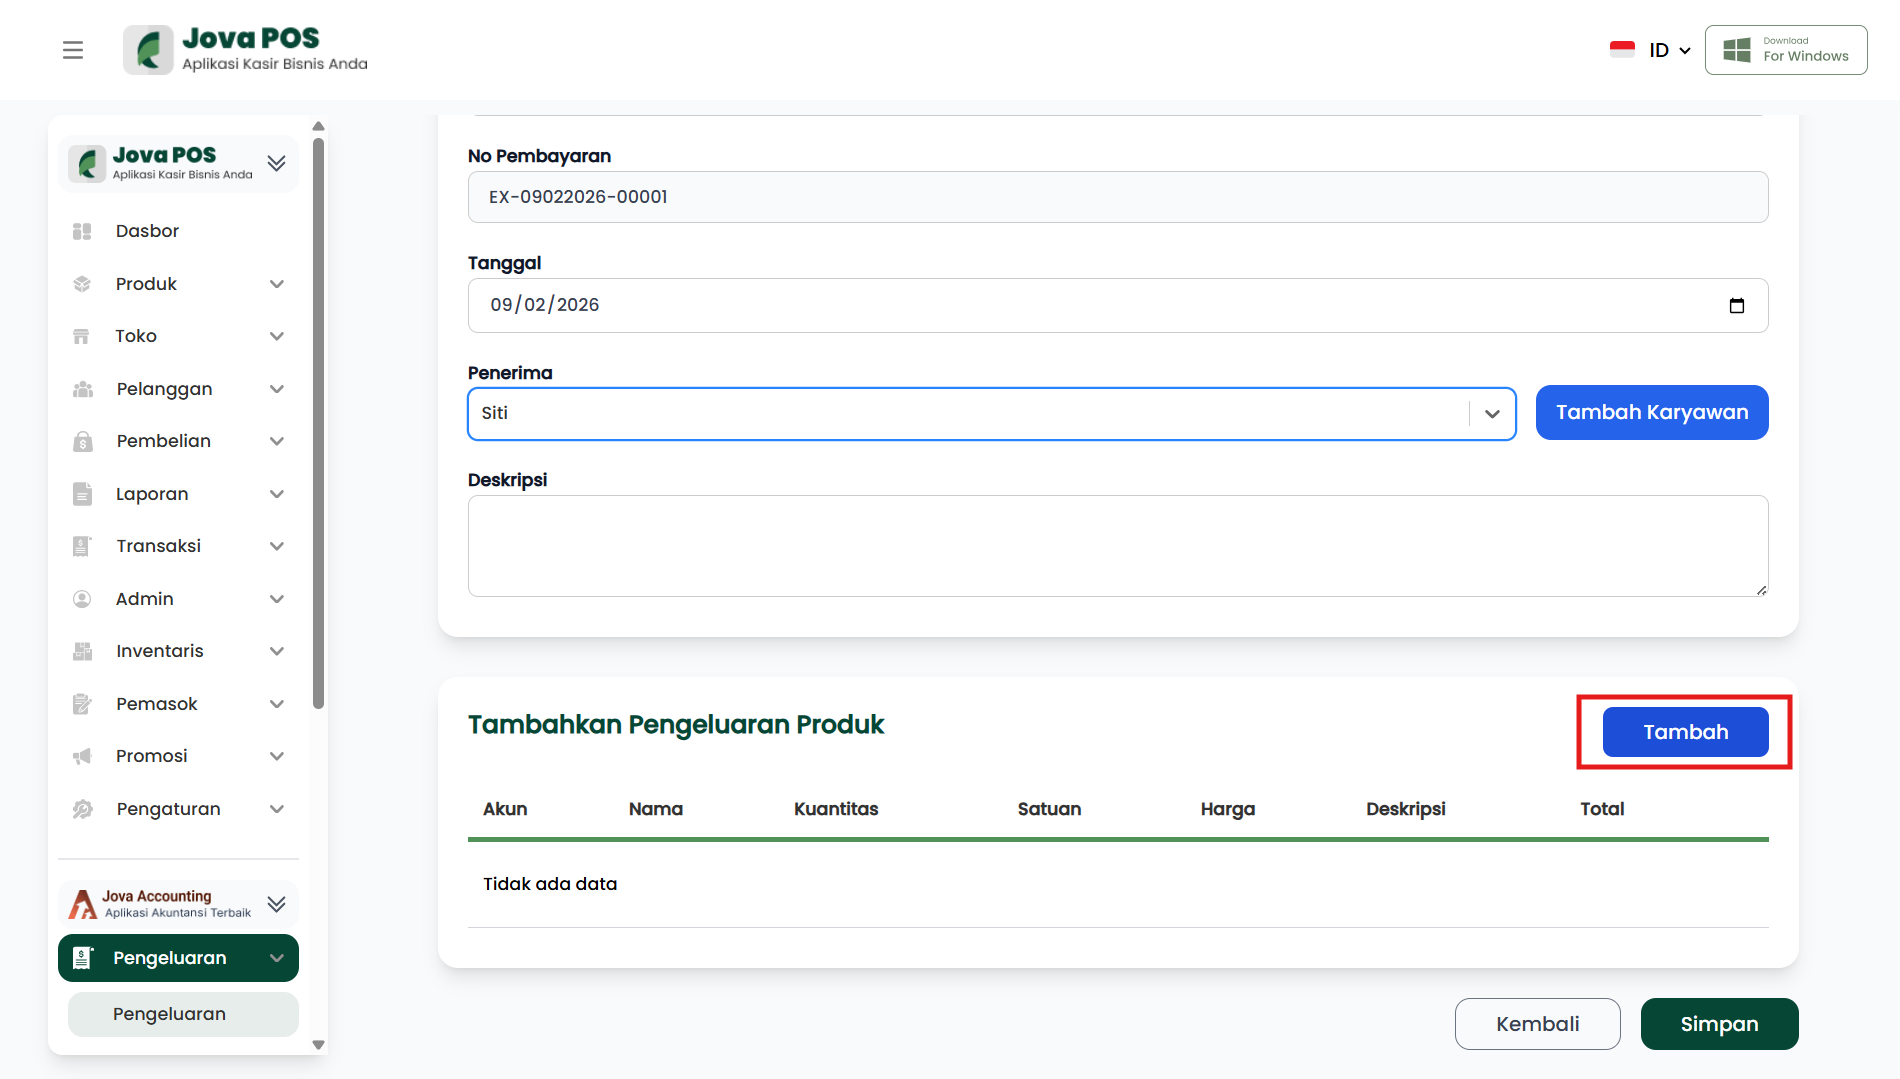
- Fill in the item row as needed. Some displays may differ depending on system settings, but the input logic is the same.
Variant A (more complete)
Usually contains columns such as:
- Account: selecting the expense source account, e.g., Credit Card or a specific cash account.
- Name: the name of the item/product being expensed or purchased.
- Quantity: the quantity of items.
- Unit: the item unit, e.g., pcs, box, kg, etc.
- Price: the price per unit.
- Description: additional notes per item, if needed.
- Total: automatic value from Quantity x Price.
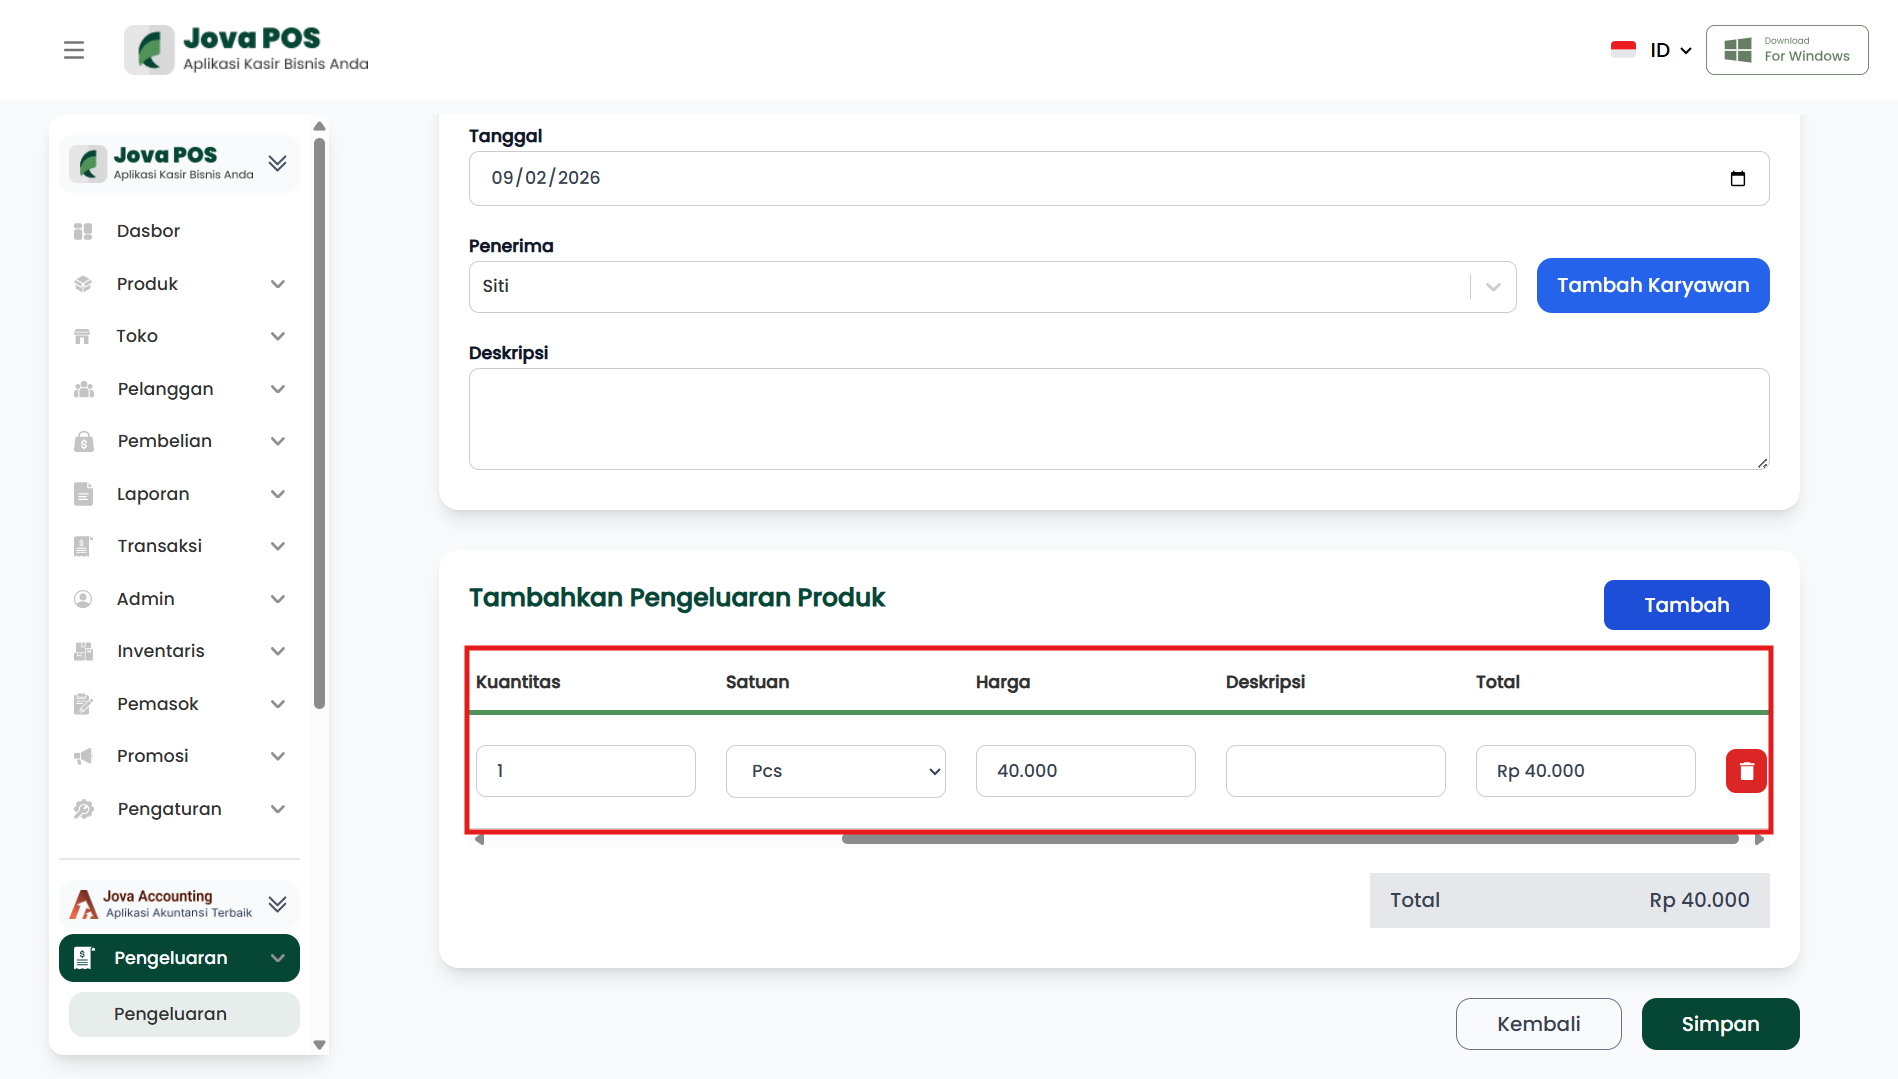
Variant B (simpler)
Usually contains:
- Quantity
- Unit
- Price
- Description
- Total (automatic)
Important notes:
- If you change the quantity or price, the Total per item will change accordingly.
- If there is a trash icon button, it is used to delete item rows that are no longer needed.
5. Saving the expense transaction
If all data has been filled in:
- Make sure the main information (Store, Date, Recipient) is correct.
- Make sure the expense item details are complete and the total is correct.
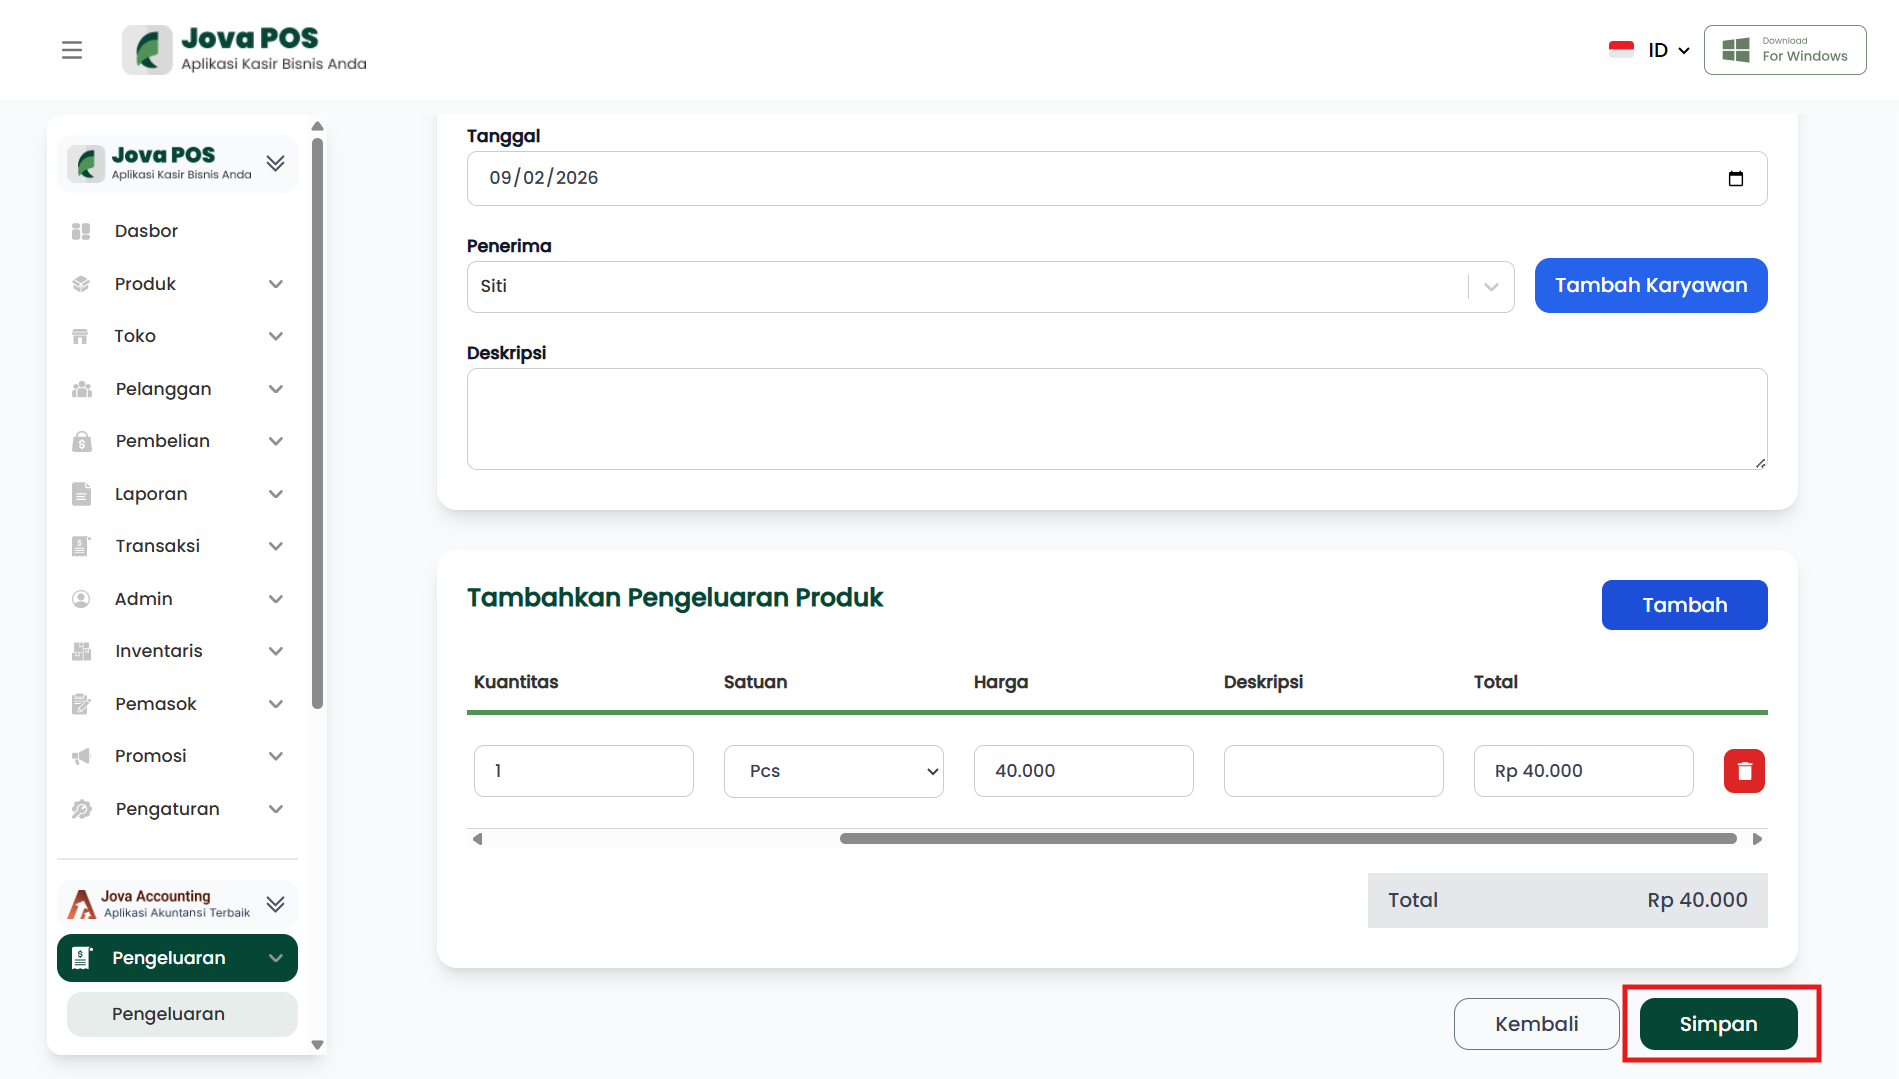
- Click the Save button at the bottom right to save the transaction.
- If you want to cancel without saving, click Back.
Tips for keeping data organized:
- Fill in the Date according to the actual date of the event.
- Use a Description that is brief but clear so it is easy to trace during audits or report reviews.
- Make sure the Outlet/Store is correct before saving, as this affects the per-outlet report.